 Creative Projects
>Work in Progress of Brain Composer
- June, 2019
This post describes the detailed development procedure of Brain Composer project.
Music Generation (Server)
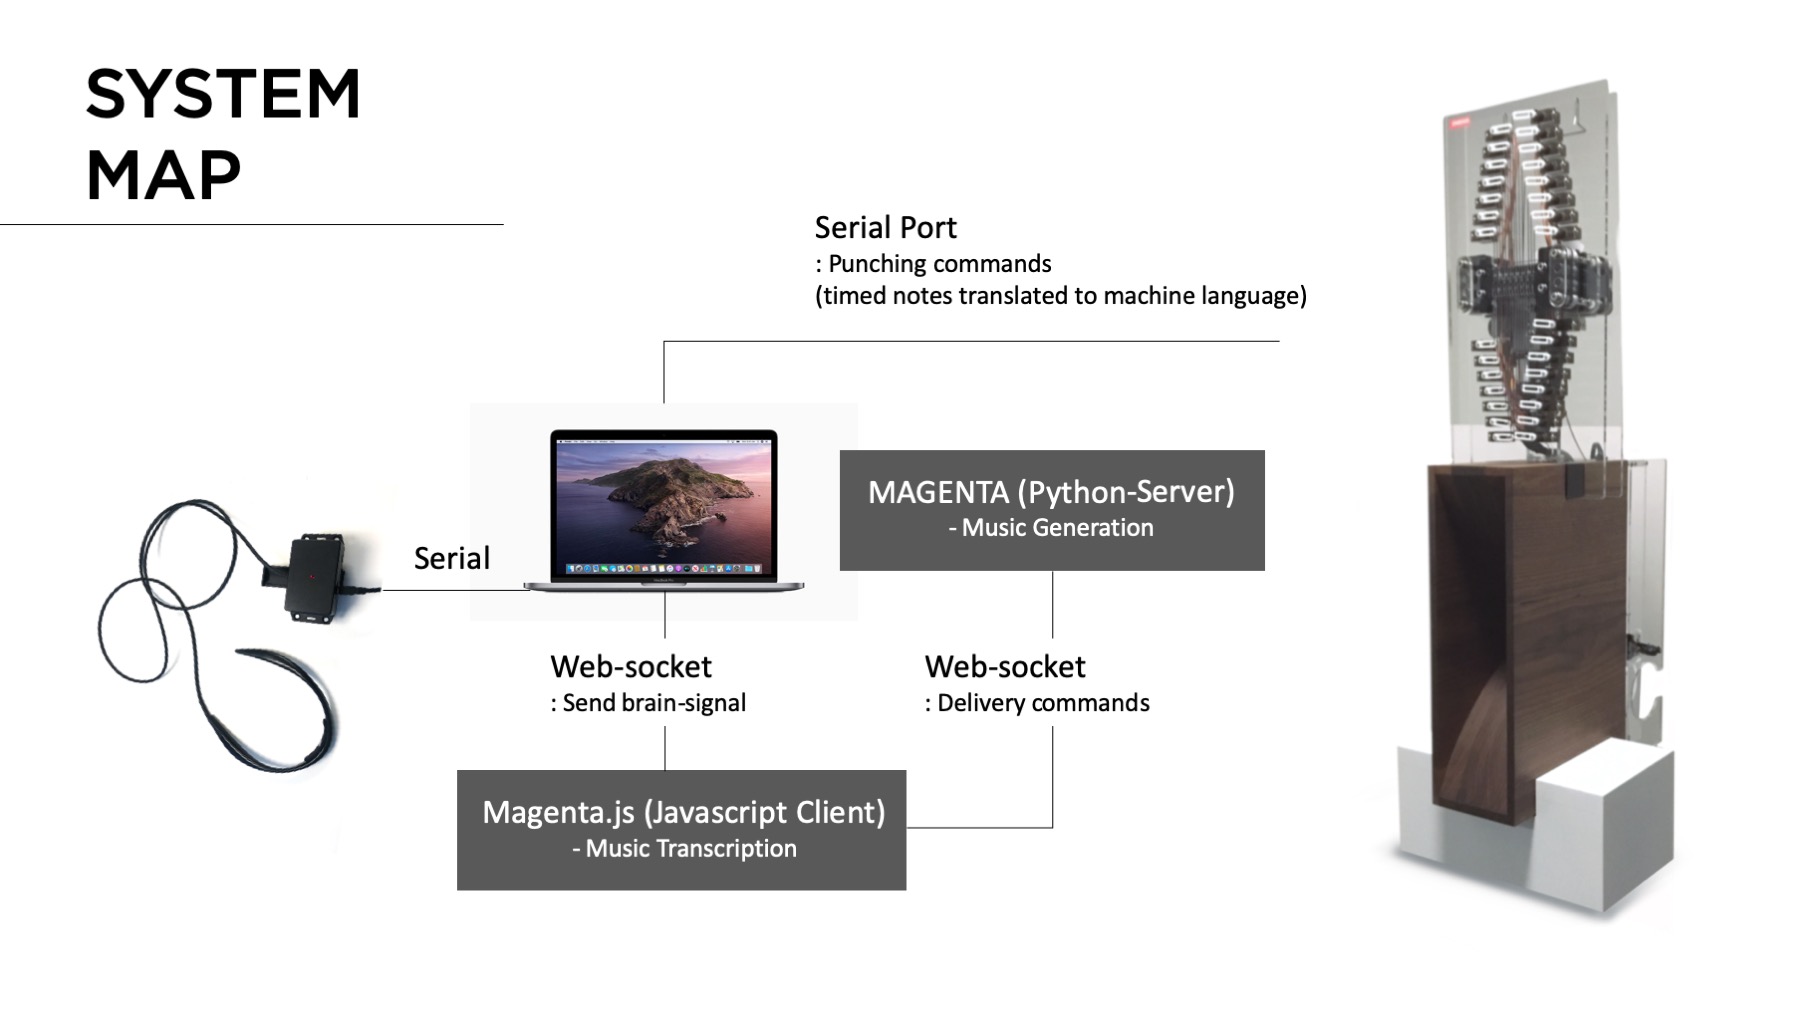
Environment : MacOS (Python - Flask) / Magenta (Python) For music style transfer, I used Magenta's Music Style transfer engine written in python. (I've always wanted to explored Magenta for so long...!) and had to make a server that interfaces main visualization page with AI core. Of course, the best scenario is to use client side only for "cleaner" exprerience, but I had to stick to python server as the Polyphony RNN is not deployed in javascript yet.
Resource : How to build a web application using Flask and deploy it to the cloud Pre-trained model : Magenta - Polyphony RNN trained on Bach's music data
Music Generation (Client)
Environment : Magenta.js / Anime.js Google recently introduced Magenta.js, letting developers to easily make an web-based interface with Magenta backend.Numerous collective examples can be found from here. I specifically used Onsets and Frames to transcribe played midi input into music notes, and mm.Player for the playback. The brain signals (8 raw signals read from the device) hits the hidden web-midi piano in the webcanvas, and the resulting midi signals are transcribed accordingly. The transcribed signals then function as a motif-melody line for the music generation.
References : Hum-2-Song, an AI-powered web application that is able to compose the musical accompaniment of a melody produced by a human voice.
Brain Interface (Connected to Client)
Environment : Web (Javascipt : P5.js) I was very much inspired by this video clip of two guys playing Nerosky's Mindflex. As the meditiation level rises, the levitated ball drifts more towards the another person's side :)
There was an easy H/W hack tutorial to connect this device to ardino with serial port, and I used this H/W circuit for the installation and redesigned the whole shape. The brain reading part was also included in the libray but was written in Processing. I later translated this into P5.js code (most of the codes are compatible to each other and was easy to implement in the web environment).
Punching Machine
This was the most challenging part of the whole development process. The initial machine was inspired from Music Box Hole Punching Machine by Josh Sheldon. However, we had to redesign the machine completely so as to decrease the punching time dramatically for the whole user experience. (We aimed to make the whole experience of the installation taking below 2 minutes in total.)
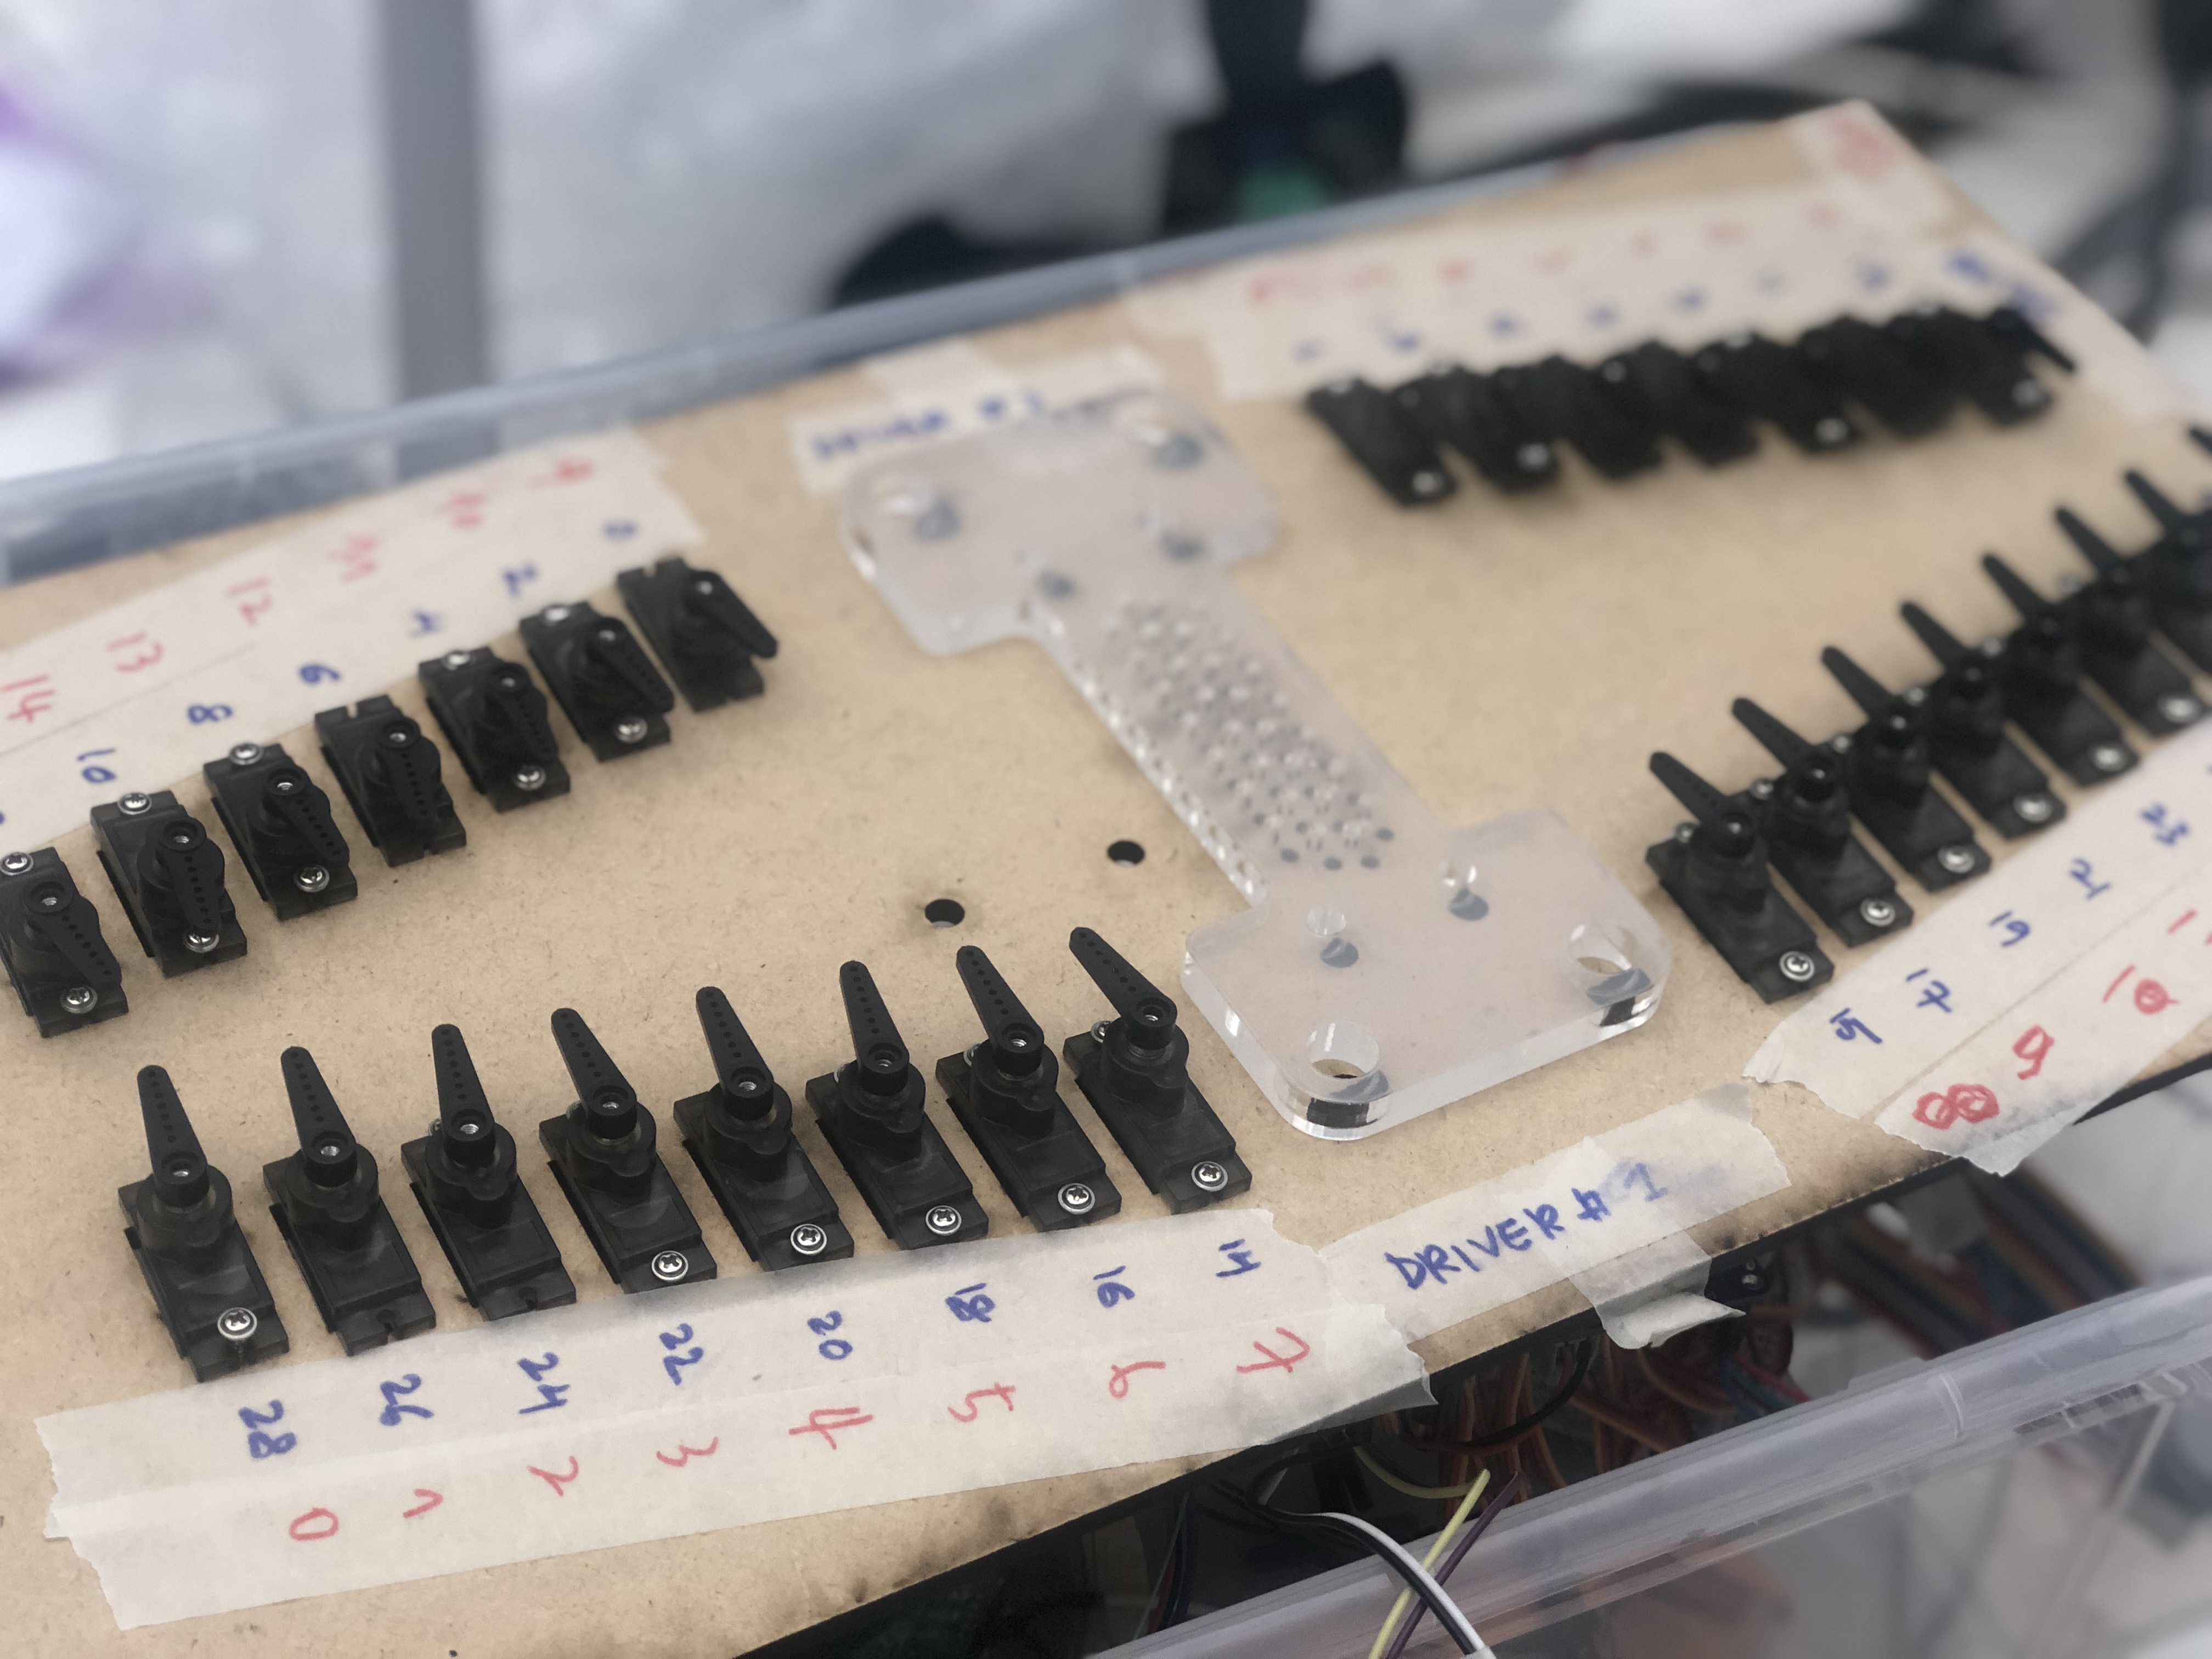
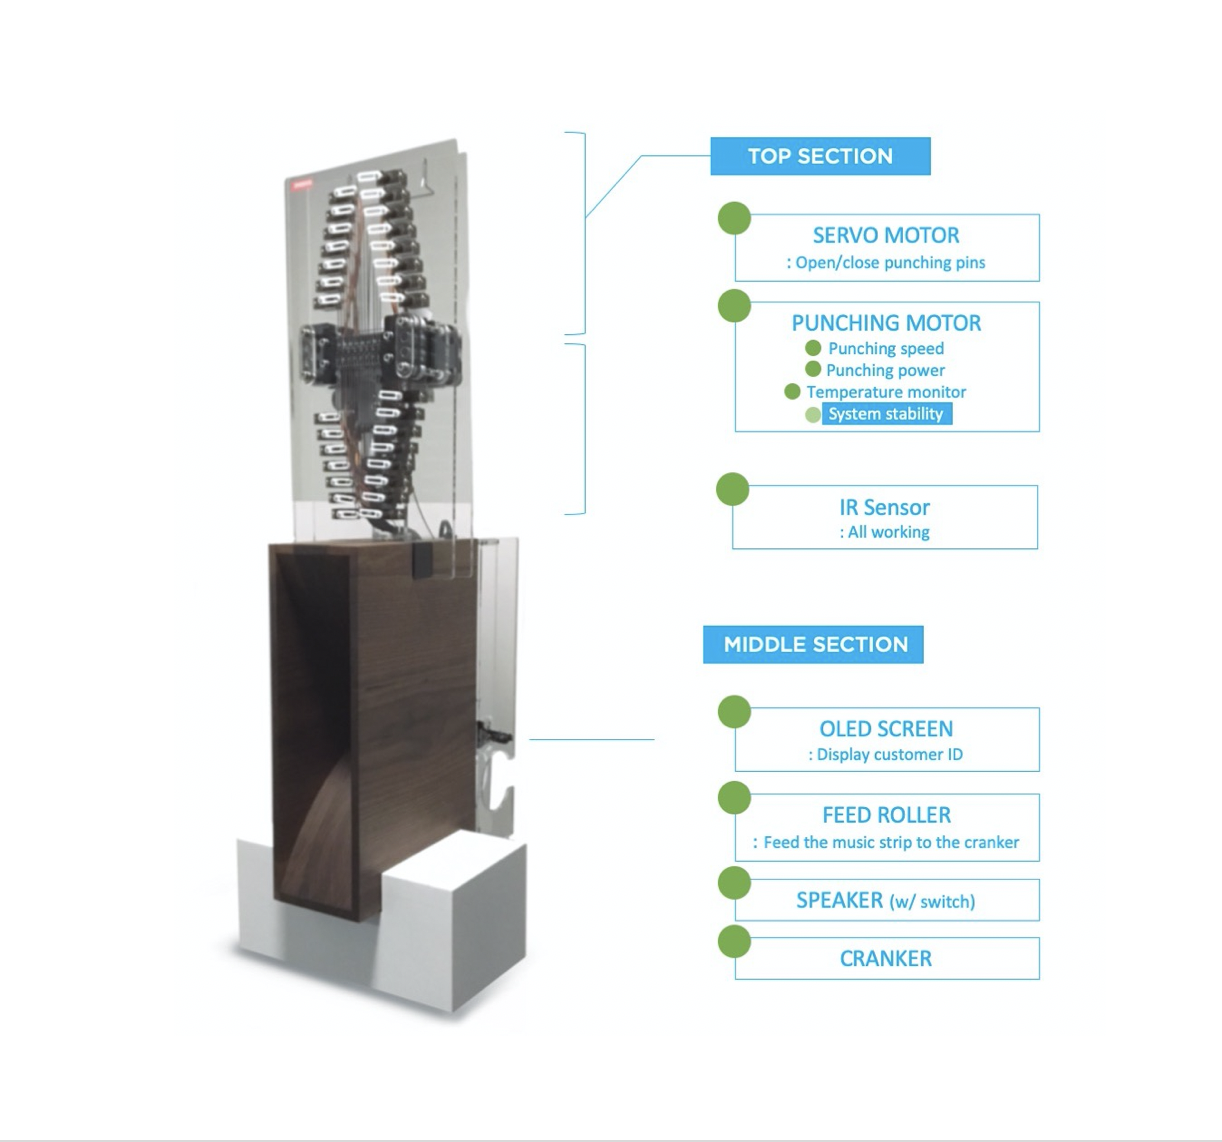
We used 30 servos that are connected with thin steel rod that open/closes the hole according to the result from the state machine. The 30 holes (As we used music box for 30 notes). The 30 holes are aligned into 3 rows (single rows are punched together) to speed up the punching speed. To do that we used Banggood's PCA9685 servo driver (I2C-bus controlled 16-channel pwm/servo controller) to stably run 30 servos (ideally) at the same time. The PCA9685 uses I2C bus to control 16 channel pwms, which requries only two signal pins (SDA/SDL) from arduino. If the address of the dirver are coded differently, we can chain up 62 drivers in max (then in theory, we can control 992 servos in total..!) This is the video clip that I'm testing PCA9685 controlling 30 servos at the same time (The max curren draw was around 5A peak. The punching module is driven with Brushless DC motor (7.6V / peak-current 10A )- later, we put later ESC driver for the safely reason.
Punching Machine - Speaker / Cranker
The bottom part of the machine includes the speaker that magnifiy the sound coming out from the automatic cranker attached to the backside of the wooden speaker. (Will be updated very soon)